FlutterFlow 1: Basics
What is FlutterFlow?
It is a tool that helps you build apps without needing to write code. Think of it as a platform where you can drag and drop elements to create your app's design and functionality.
1. Overview of FlutterFlow's Core Interface
The interface of Flutterflow is organized into five sections: widget palette, canvas, properties panel, navigation menu, and widget tree.

Widget palette: is like a toolbox filled with pre-made pieces (widgets) to build. You can drag buttons, text boxes, images, and other elements from here onto your app's screen.

Canvas: the screen where you visually assemble your app. It's the main area where you drag and drop widgets from the widget palette and arrange them to design your app's layout.
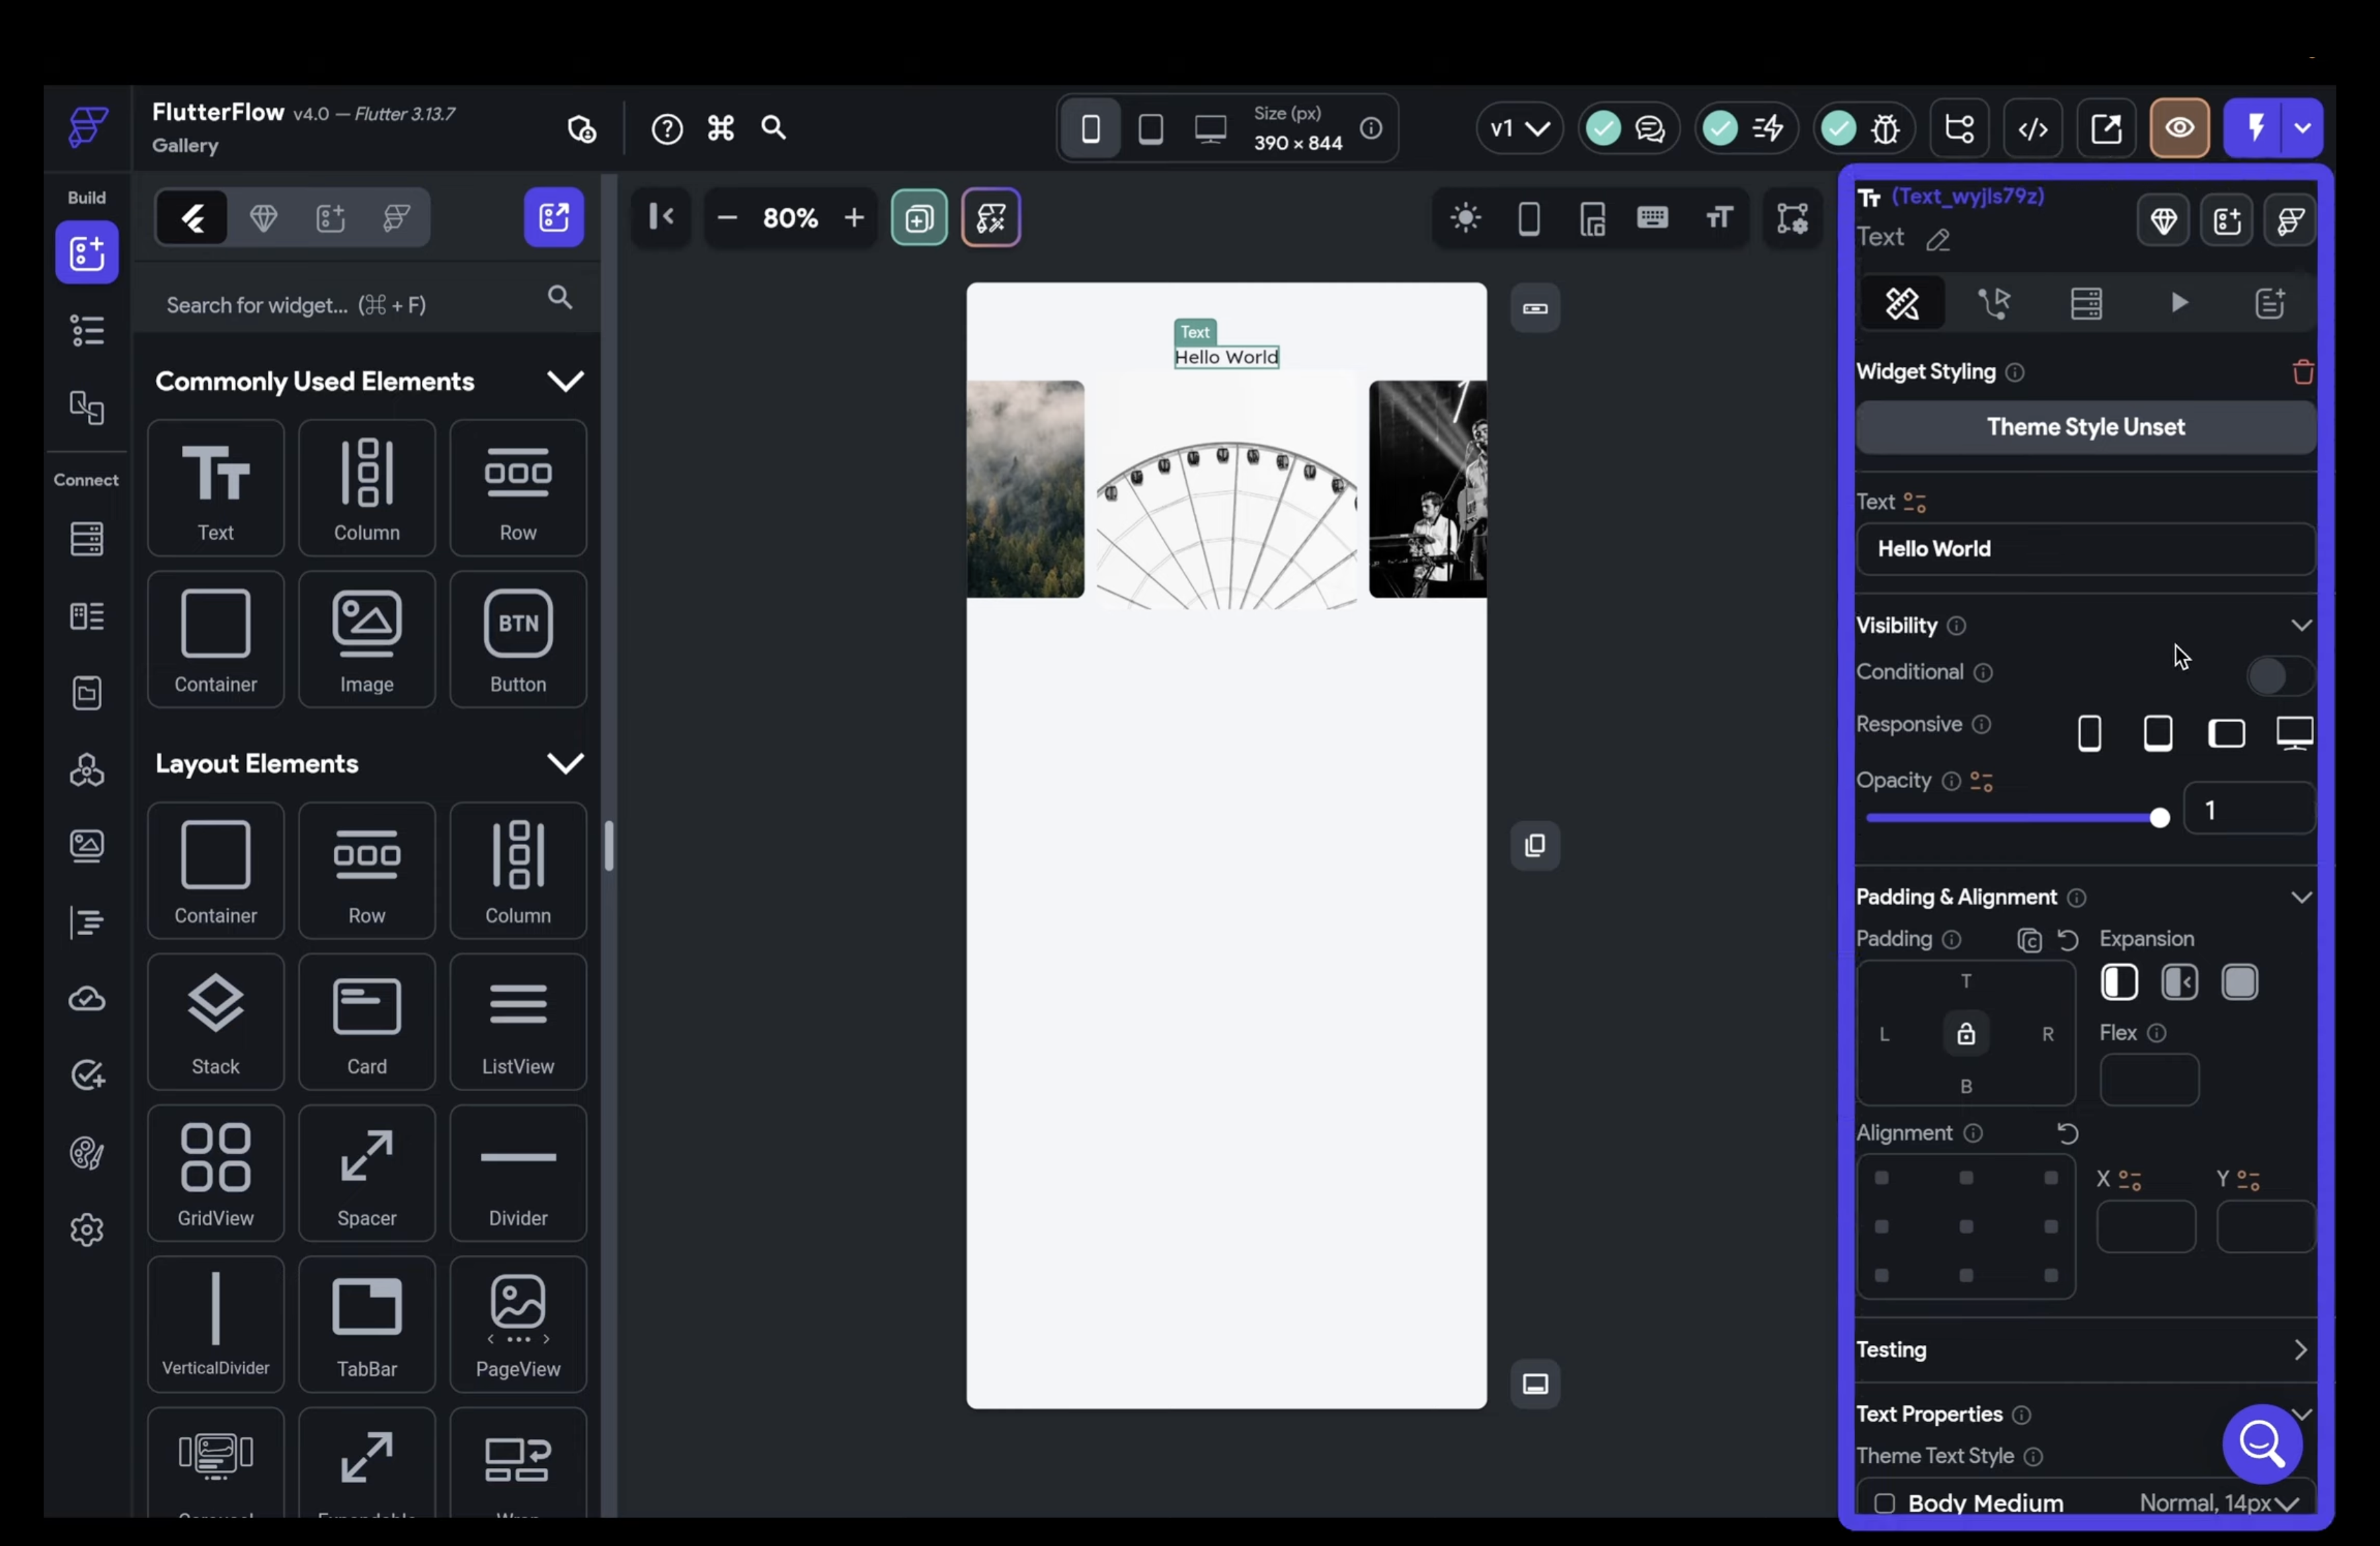
Properties Panel: this is a settings area for each piece (widget). When you select a widget on the canvas, the properties panel shows you all the things you can change about it, like its color, size, or text.

Navigation Menu: includes widget tree, displaying page structure, and enables actions like creating new pages or using AI.

Widget Tree: shows you how all the widgets in your app are organized and connected. It helps you understand the structure of the app.

2. Using Test Mode in FlutterFlow
- initiated by clicking the lightning bolt icon (right up), allowing for real-time edits and quick refreshes of the app
- It is essential for network calls to access data from backend databases or APIs
- also necessary for implementing logic actions (things your app does in response to user input or other events), such as navigation, popups, and form submissions
- Some animations require test mode to be fully viewed
- Pre-built pages, such as profile and notifications pages, can be easily added and customized within the app
3. Adding Navigation
- Navigation allows users to move between different pages within the app
- The action configuration (how you set up and customize what happens when a user interacts with something in your app) for navigation is handled in the properties panel, specifically under the action flow editor tab
- Steps to set up actions:
- Select the trigger
- Add the action (e.g., navigate)
- Configure the action
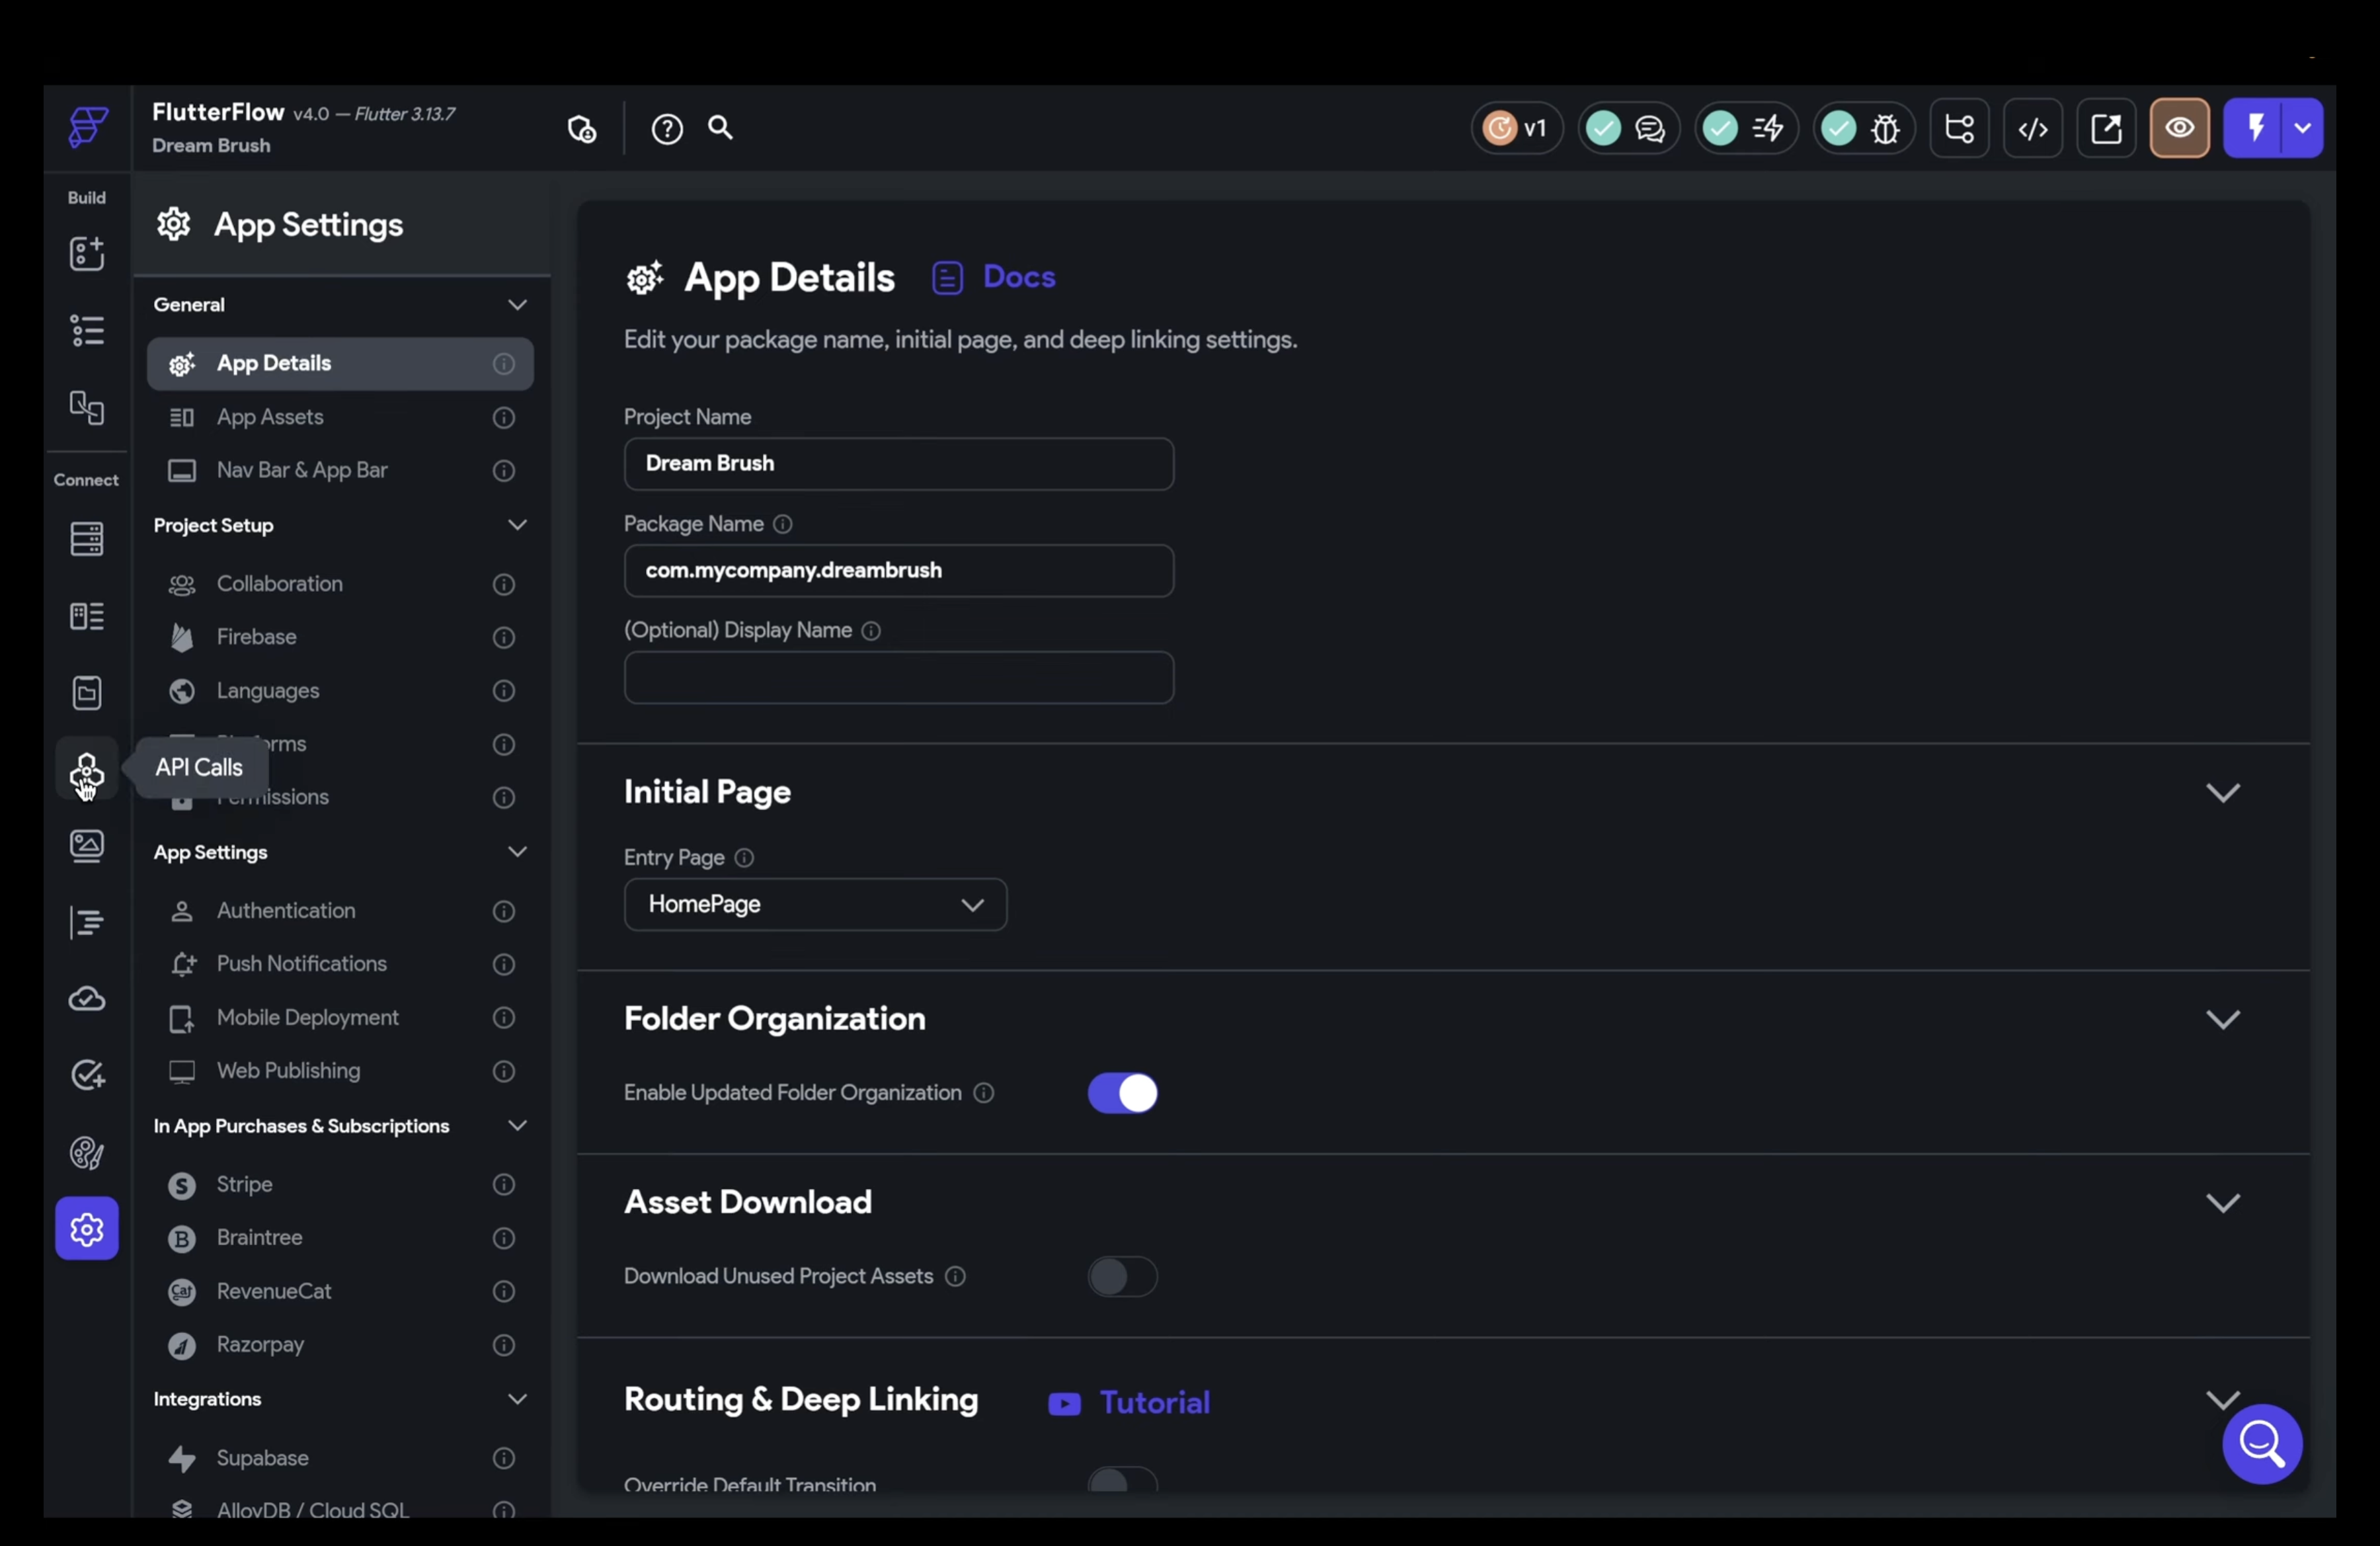
- Set the initial loading page in settings

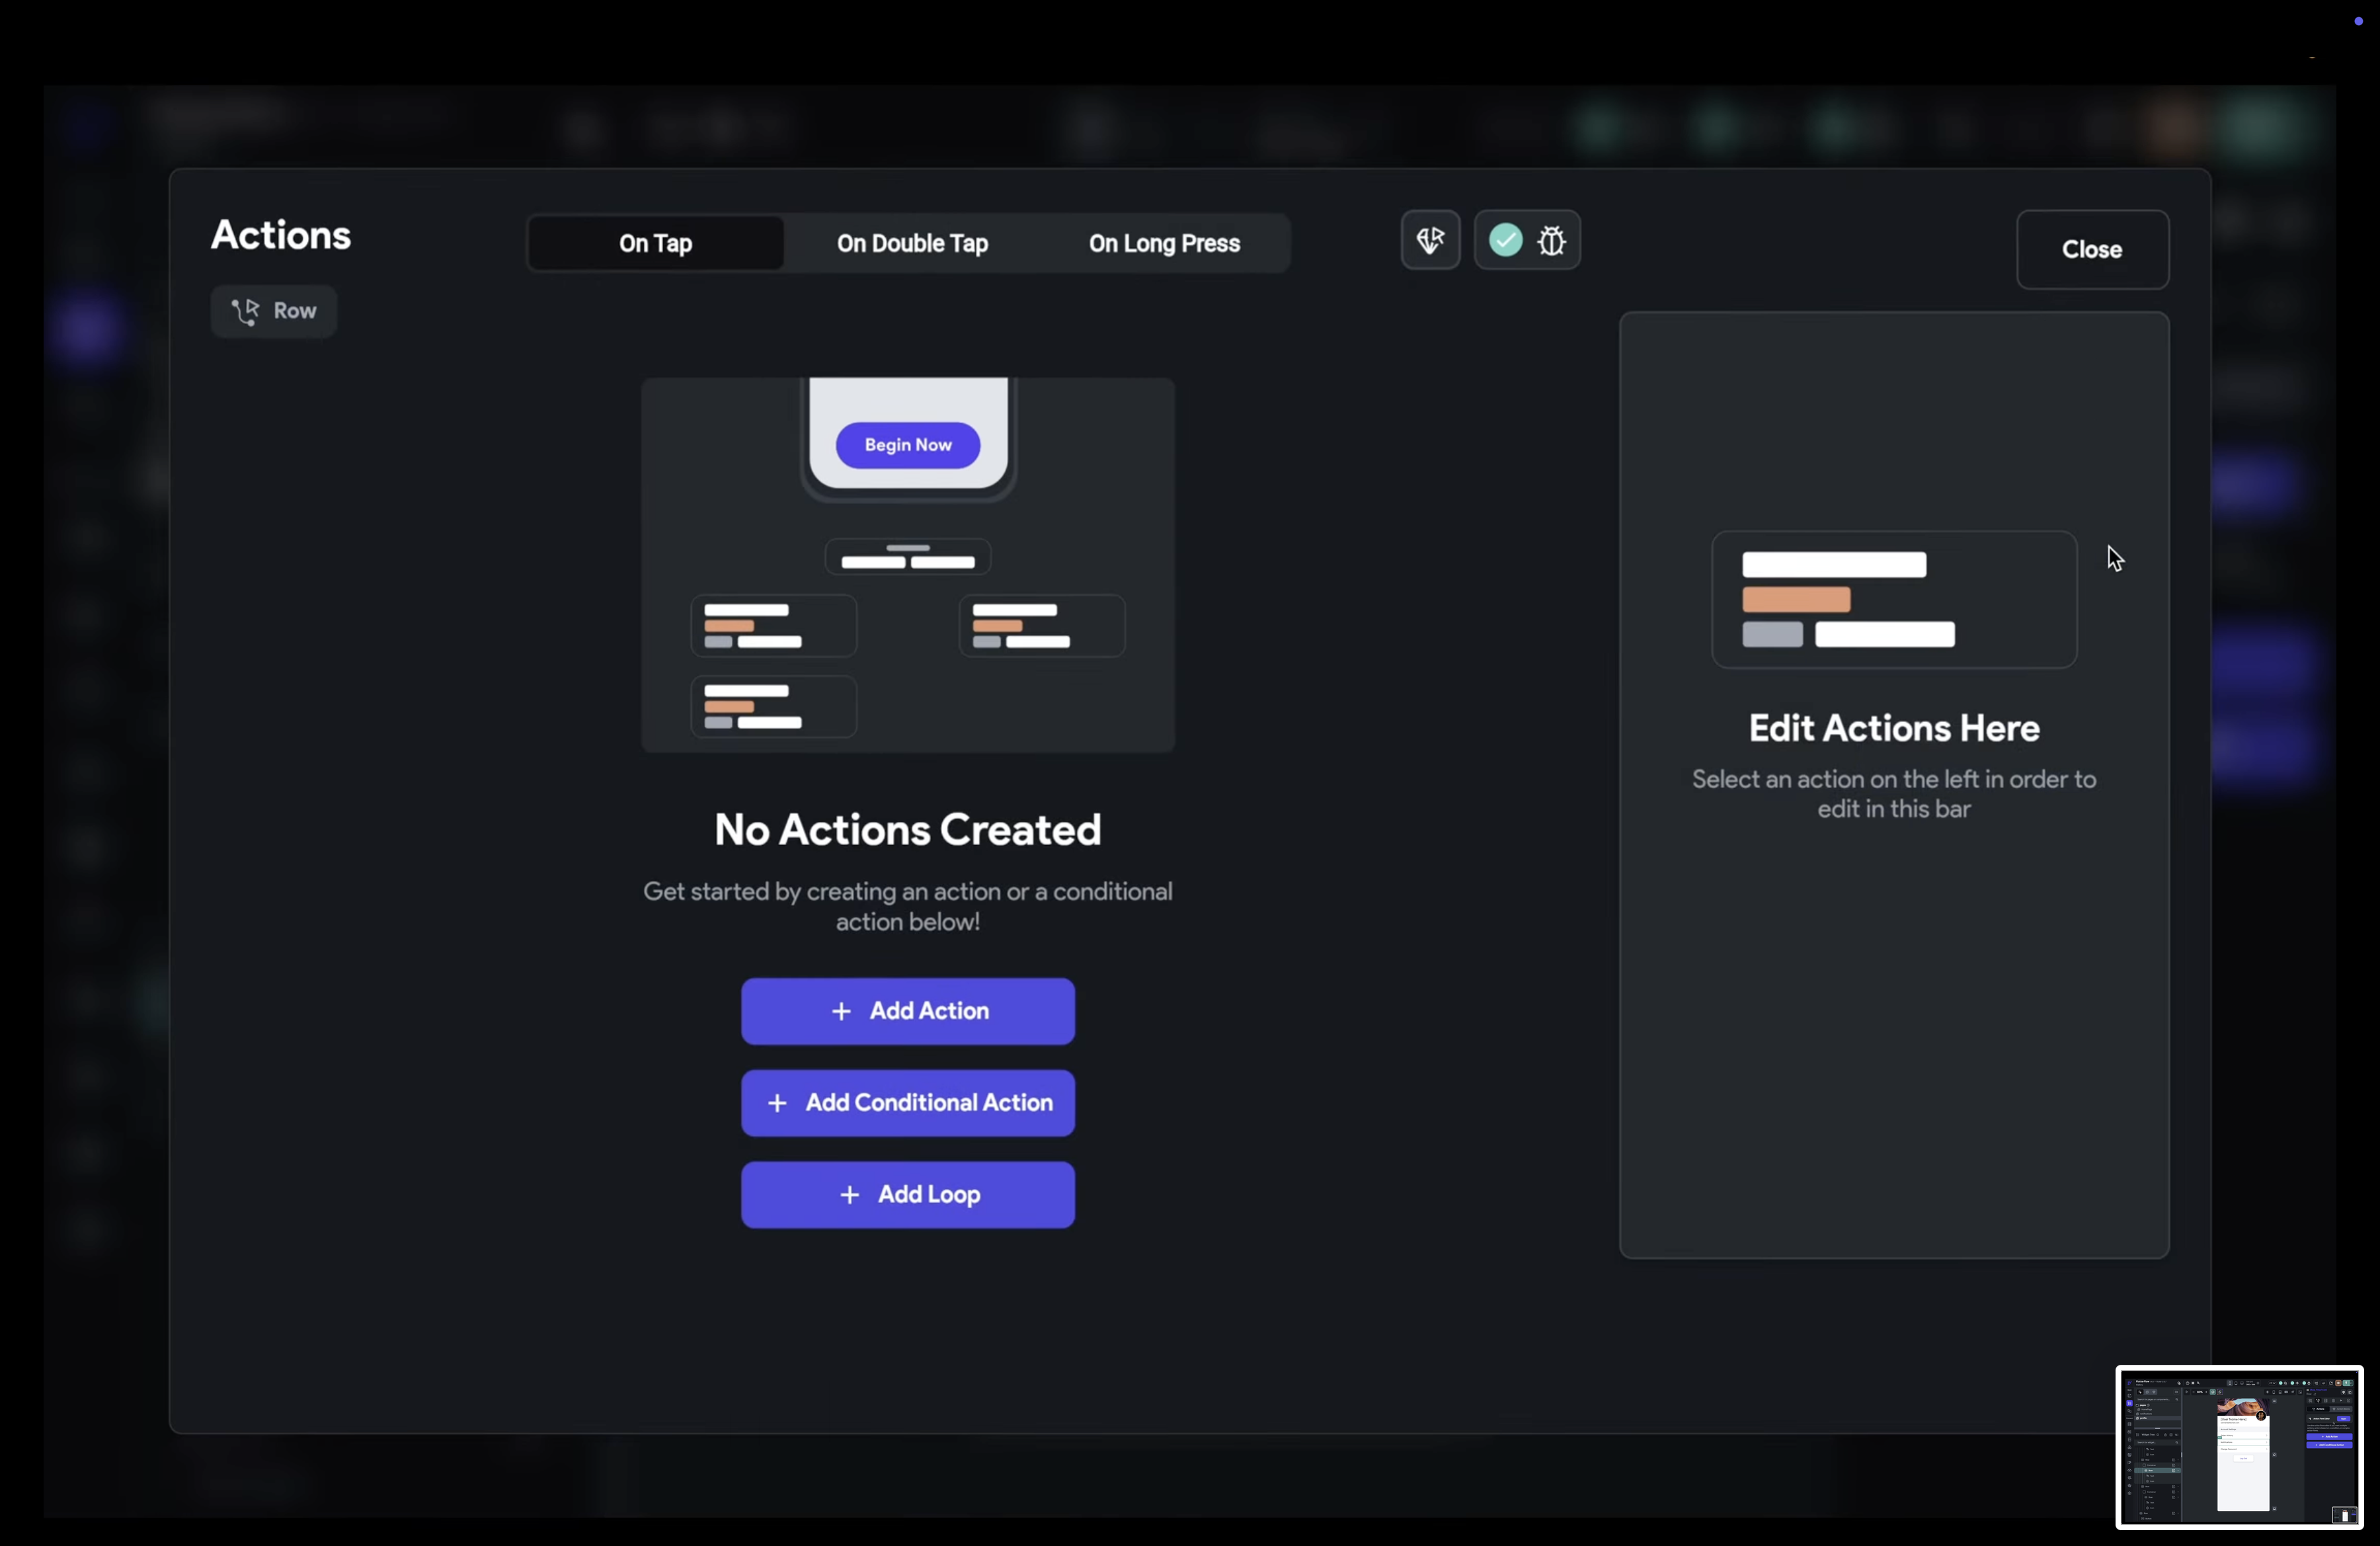
- To set up navigation, first, select a trigger that determines when the action occurs

- Next, the desired navigate action can be chosen from a list of available pages


- Finally, it's essential to set the initial page in the app settings to ensure correct navigation flow during testing
- it determines thefirst screen displayedwhen the app launches

4. Setting Up a Backend Database in FlutterFlow
- flutterflow natively supports firebase and supabase, and allows integration with any database through an api manager
- To set up a new firebase project, users need to select a name, location, and sign in with their Google account


- Importing images into firebasecan be done easily through a CSV file, and connecting the collection to a front-end component, such as a Carousel, is seamless
Interaction Between Frontend and Backend
- The interaction between frontend and backend often occurs through APIs (Application Programming Interfaces)
- The backend exposes endpoints for the frontend to send requests, which it then handles and responds to with data
- Backend code executes on a server, located either in data centers or cloud platforms like AWS, Google Cloud, or Azure
- The server processes requests, manages data, and sends responses back to the frontend
- Frontend code runs on the user's device, responsible for displaying the user interface and managing user interactions
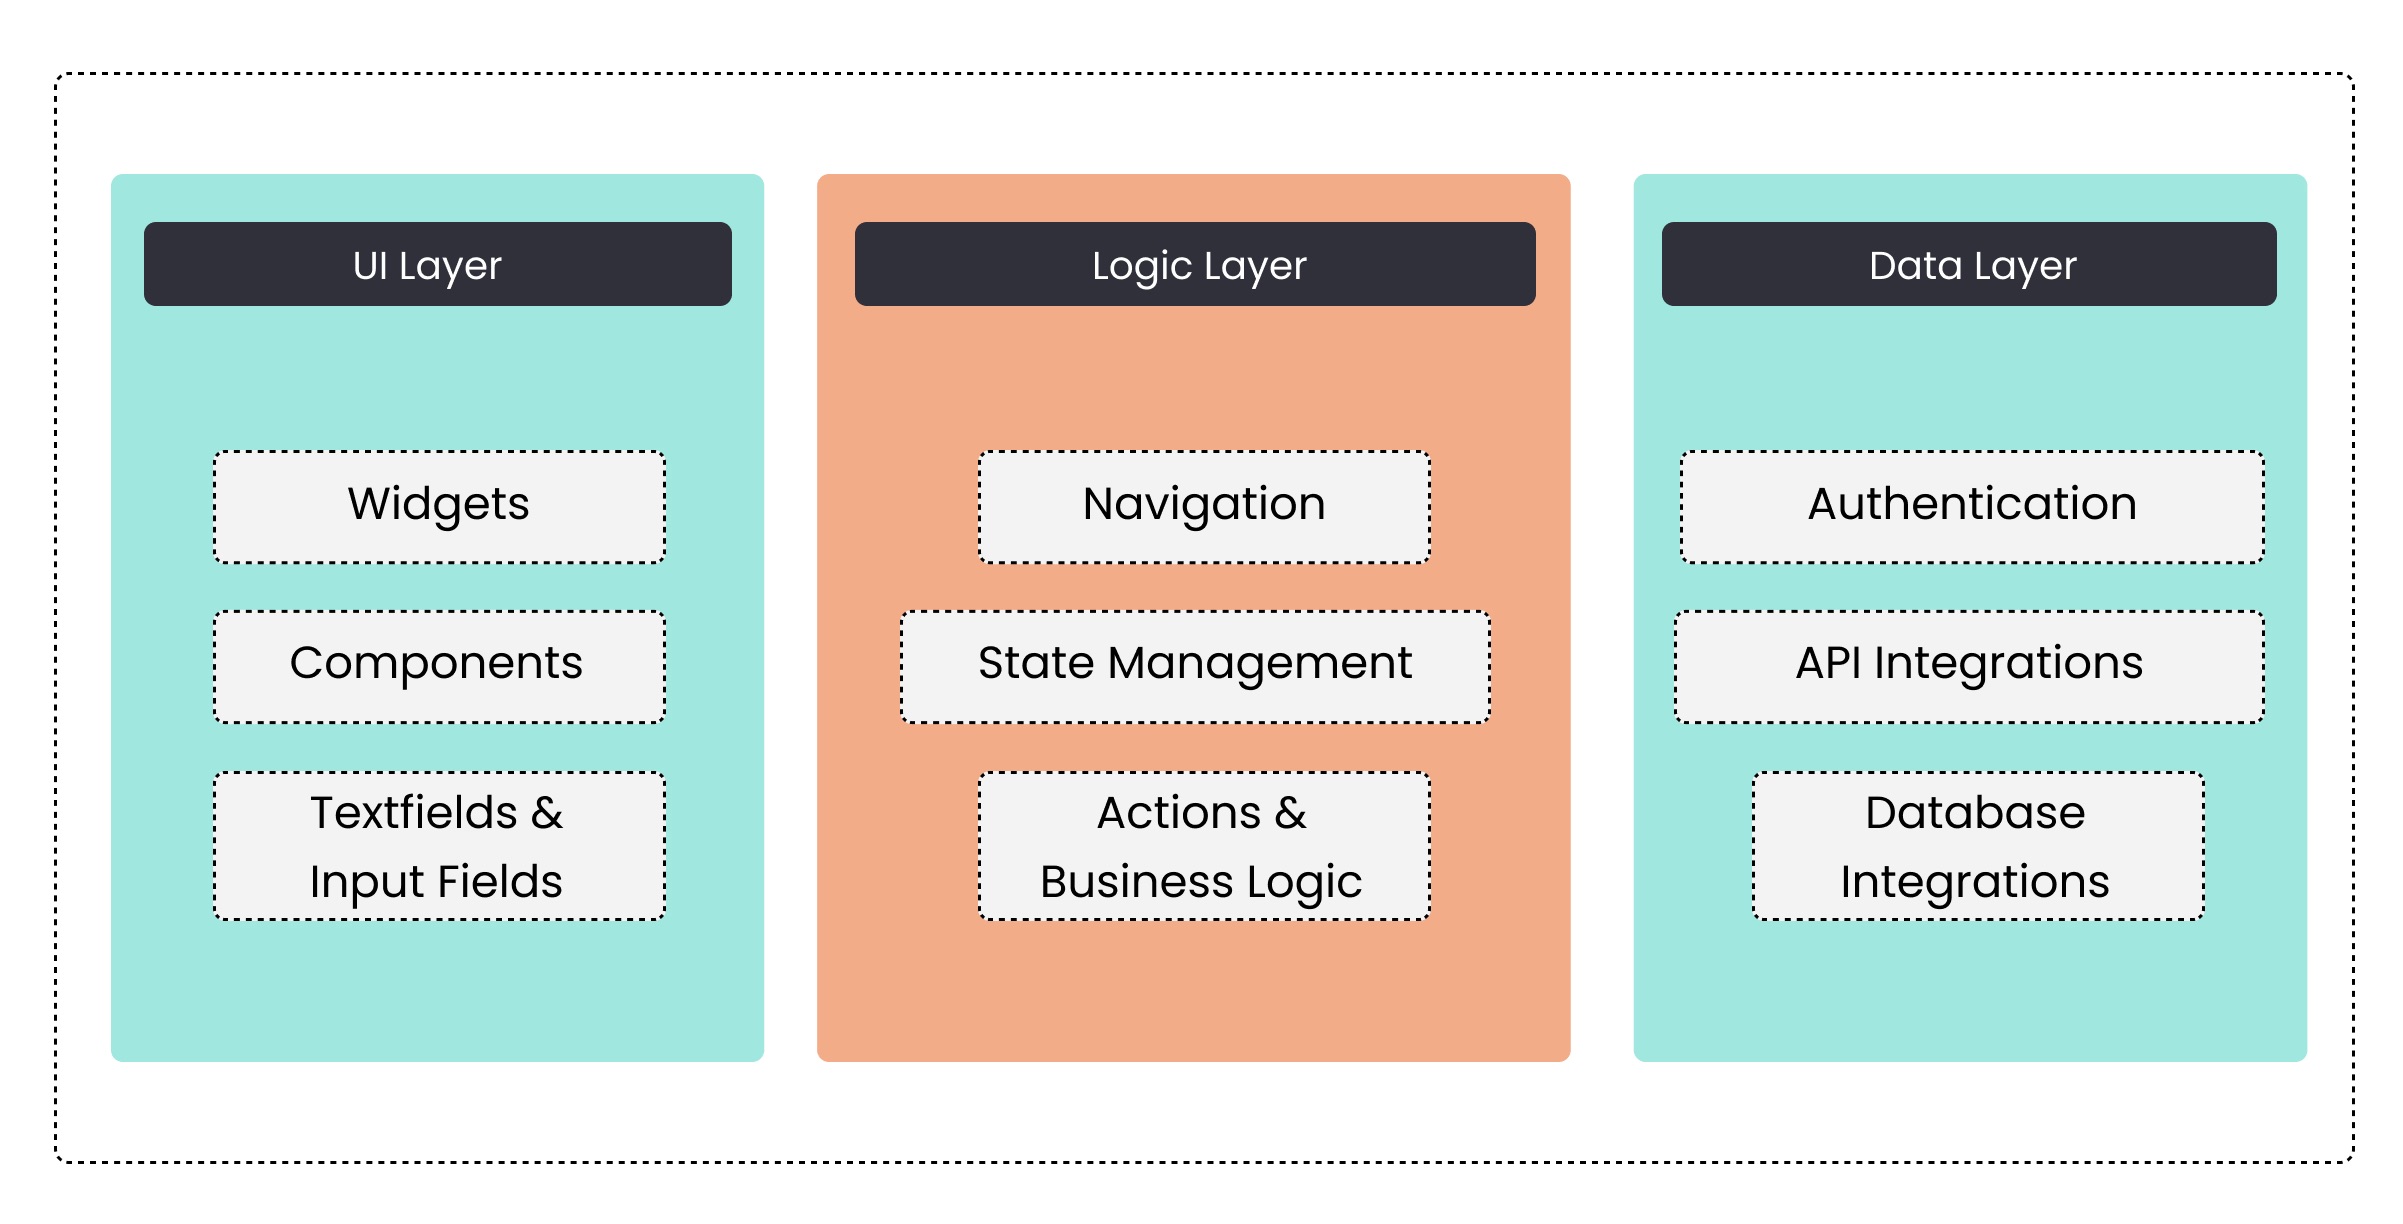
Frontend Architecture Best Practices
- Component-Based Architecture involves breaking the UI into reusable components that enhance modularity and maintainability
- State Management addresses the handling of application state, which encompasses both displayed data and user interactions
- Responsive Design ensures optimal performance across various screen sizes through the use of flexible layouts and scalable assets
- Performance Optimization focuses on improving app efficiency by optimizing rendering, minimizing network requests, and reducing asset sizes